I won't be dreaming any longer once my shed project is complete. After some shuffling of family members this year the promise of a craft room came and went in the twinkle of an eye. It left me feeling hemmed in and frustrated because the space that I aspired to might not be available for a few years. And I'd been putting off crafts that I used to do for years already!
Inspired by some of my favorite home design blogs, including one of my top favorite blogs, decor8 and her lovely blog post about the crafting sheds of the dynamic duo, junkaholique.
As I gawked at these tiny spaces, it occurred to me - my own lightbulb moment if you will - that I had a woeful shed sitting out in my backyard. When we bought our house it came with two sheds, both tidily placed on cement foundations and with electricity and at least one had a cold water faucet attached. One shed was converted by my husband about a year ago to house his welding passion and his C&C machine that he is currently building. The other shed was dubbed mine but was named the garden shed. When it was originally built, It was split into half by a wall and two outer doors were attached. One side currently houses our daughter's life goods while she attends college. The other half was the gardening part of the shed, with shelves for seeding plants, chemicals and all sorts of pots and spiders. Used by the original owner (who owned the house for almost 30 years), it had been relatively unused by me except for a bit of garden storage. I tend not to grow plants by seed and it didn't seem to figure into my normal gardening routines. I hemmed and hawed for years with this space even contemplating knocking out the dividing wall and making it one full room.
Then, I saw Decor8's fantastic post and it became very clear what my mission with this shed was to be. Since it had a solid frame, good metal roof, and cement floor, this space could be my craft shed!
While we are not yet finished, here are pictures of my own shed project in it's infancy.
Cleaning out the garden objects took very little time, and I even found a bit of weed killer that I used on the pesky weeds next to the driveway! Of course, the spiders were very unhappy to have their cozy home disrupted.
I should have taken a picture of the inside before we removed the garden shelves. But once they were gone I realized that there's much more floor space than I originally thought!
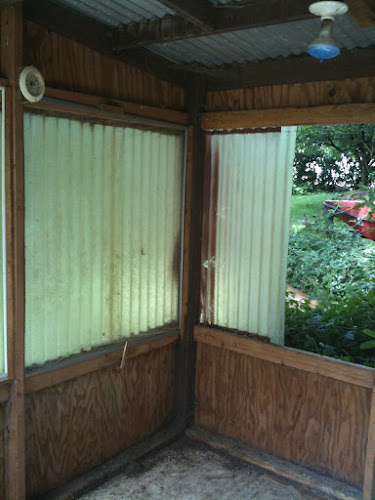
As you can see, the walls were partially rippled, dingy plexiglass. I have one window that I bought years ago at a garage sale (no really!) and my landscape coordinator volunteered another window that his contractor father had found as a closure sale for $5. So my shed will have two new windows. They don't match but aren't going to be on the same wall.
My hubby has been great at humoring me. He likes digging in and completing a project. You can see one of the shelves below his hammer.
Look at that huge space! Currently it is waiting for walls! My other helper, Wills was very happy to vacuum up all the spiders.
Currently it is waiting for walls! In the meantime, I am dreaming of my future in this great crafty shed!
Living fashionably one day at a time!


No comments:
Post a Comment